Quantcast
Channel: Hardware & Software Useful bits
Viewing all 38 articles
Browse latest View live

Serial console mod for RK3188 stick Cozyswan S400

$
0
0
First of all, I would like to thank KSK Electrics for kindly donating this S400 stick (and a MK908) to support the Linux kernel porting on RK3188 devices.


A serial console for the Cozyswan S400 was needed in order to debug the boot problems encountered with the RK3188 kernel source "freed" by Andy from Rikomagic.

Also, since this kernel removed support for the framebuffer console (the text you [should] see on screen at boot, or in text Linux, before installing any XFCE/Gnome/...), the serial console is the only way to see what's happening when there is something wrong.

Fortunately I was able to successfully backport the framebuffer console so that now text is back on screen for Linux!

In any case here is the mod to get the serial console pins, thanks to Alok Sinha, who found those pads to be the serial output. They looked to me so much like an IR tx/rx connector that I would have tested every other pad before trying those! :)

Left to Right: The R (RX) pad for receiving keystrokes, the T (TX) pad for sending to your
Serial2USB module the text, and the required G (Ground) 

Actually only TX and Gnd are needed to receive the boot text, so I usually solder just those two.


The pads are small, with a tiny bit of solder on the iron tip and
another tiny bit on the cable, you should get good results

Omegamoon, who did the MK808 (RK3066) and MK908 (RK3188) sticks' serial console mods, recommends this nice Serial2USB module.


The three clams, as I call them

You can find here the Serial mod instructions for the Measy U2C RK3066 stick.

I hope it helps!


Root Rockchip sticks/tablets from Linux

$
0
0
Since with every new device it becomes a nightmare (at least for me, that I seldom use Windows) to find the right Windows drivers for ADB access... I noticed that the rooting procedure (TPSparky Vondroid) relies only on the adb command and... that is readily accessible from Linux.

Hence this little guide came up as I put together the necessary little bits and has been tested with a RK3066 based tablet (RK3188 devices might also be rootable with this method, please confirm).


1st Set up Linux ADB access to the device


This step is entirely done from the Linux PC (Ubuntu in this case) where the RK device is connected (through the USB). 

Please note that if your RK device has several USB ports, there will be only one that can be connected to the PC, usually marked as OTG or Slave.


1) Download the lightweight adb tools:
sudo apt-get install android-tools-adb
or, if you don't have Ubuntu, proceed to download and install the whole Android SDK :S


2) Open/create the following text file to let your standard user connect to the RK device:
sudo gedit /etc/udev/rules.d/51-android.rules
and then add a new line with the following text:
SUBSYSTEM=="usb", ATTR{idVendor}=="2207", MODE="0666", GROUP="plugdev"
Of course make sure that your Linux user is part of group "plugdev" with the following terminal command:
groups user

3) Force a reload of the USB access rules to get the latest one on:
sudo udevadm control --reload-rules

4) Add RK devices USB Vendor ID to what adb may expect for your currently logged user:
echo "0x2207">> ~/.android/adb_usb.ini

5) Restart the adb server by typing:
adb kill-server; adb start-server
6) And now when typing the following terminal command:
adb devices
you should see the connected device listed (my tablet for example is named 12345678...)


2nd Set up the RK device for ADB access


Unplug the RK device from the USB and go to its Settings page to follow this steps:

1) Go to Settings->Storage and click at the top right on the three dots

2) Select USB computer connection in the dropdown

3) Select "Mass Storage" check box and go back to Settings

4) Browse down in Settings and select Security

5) In Security Settings, select "Unknown sources"

6) Scroll down in settings and select Developer Options

7) In Developer Options, select "USB debugging"

8) Close settings, and any other open apps.

9) Using a known good USB cable, connect the RK device to the PC, you'll get "Connecting to USB" in the notifications area in Android, and a USB icon in the notification area. You Do Not want to select "Connect to Pc to Transfer Files", in the notification menu, just plug in the cable and let it be.


3rd Rooting the RK device from Linux


The following steps are just a COPY of those in "TPSparkyRoot.bat" with a minor fix for correct SuperSU installation.

These are to be done on the Linux PC:

1) Download the package with the needed su, SuperSU, busybox, and RootExplorer binaries

2) Extract the package into a folder, open a terminal and cd into that folder

3) Create a new text file (i.e. "gedit script.sh") and copy the following contents:

   echo "*---* VonDroid.com RK device Root Tool based on work by sunnydavid *---*"
   echo "--- Plug in your device, make sure debugging is enabled in Developer Options"
   echo "--- This script will now copy files over to your RK device"
   
   adb shell mv /data/local/tmp /data/local/tmp.bak
   adb shell ln -s /data /data/local/tmp
   adb reboot
   
   echo "--- Reboot 1/3 - Press Space Bar once the device has rebooted"
   read -p "or CTRL-C to exit"
   
   adb shell rm /data/local.prop > nul
   adb shell "echo \"ro.kernel.qemu=1\"> /data/local.prop"
   adb reboot
   
   echo "--- Reboot 2/3 - Press Space Bar once the device has rebooted"
   read -p "or CTRL-C to exit"
   
   adb shell id
   
   echo "--- If the ID shows as 0(root) then continue, otherwise CTRL+C to cancel and start over"
   read -p "CTRL-C to exit"
   
   adb remount
   adb push su /system/bin/su
   adb shell chown root.shell /system/bin/su
   adb shell chmod 6755 /system/bin/su
   adb push busybox /system/bin/busybox
   adb shell chown root.shell /system/bin/busybox
   adb shell chmod 0755 /system/bin/busybox
   
   echo "--- Installing SuperSU"
   
   adb push SuperSU.apk /system/app/SuperSU.apk
   adb shell chown root.root /system/app/SuperSU.apk
   adb shell chmod 0644 /system/app/SuperSU.apk
   adb push RootExplorer.apk /system/app/RootExplorer.apk
   adb shell chown root.root /system/app/RootExplorer.apk
   adb shell chmod 0644 /system/app/RootExplorer.apk
   
   echo "Completing Root ..."
   
   adb shell rm /data/local.prop
   adb shell rm /data/local/tmp
   adb shell mv /data/local/tmp.bak /data/local/tmp
   adb reboot
   
   echo "--- Reboot 3/3 - Your RK device should now be rooted!"


4) Make the script executable with: 
chmod +x script.sh

5) Execute it ( ./script.sh ) and follow the steps to the later, including patiently waiting for the potential several-minutes-long pauses


That's it, your device should be rooted, all from within Linux!


DISCLAIMER: I've followed this instructions to root my own devices without any trouble. The rooting procedure itself is simply the very widely used TPSparky method. However I take no responsibility for any mishappenings that may arise from your trying it on your devices. That is entirely yours.


References:
http://forum.xda-developers.com/showthread.php?t=1526487
http://linux-rockchip.info/mw/index.php?title=ADB_shell_with_RK3066
http://forum.xda-developers.com/showthread.php?t=2127573

Testing real screen resolution on RK Linux

$
0
0

Problem:


You think you have a 1080p screen resolution but when you draw a non-aliased one pixel width line and move the window around, it doesn't look one solid line anymore.

You're not on 1080p, but likely on a scaled 720p (even if Linux reports 1080p).


Test:


On a console type:

cat /sys/devices/platform/rk-fb/graphics/fb0/disp_info

for a working 1080p setup, the result should be something like:

win0:enabled
xvir:960
xact:1920
yact:1080
xdsp:1920
ydsp:1080
x_st:192
y_st:41
x_scale:1.0
y_scale:1.0
format:RGB565
win1:disabled
xvir:0
xdsp:320
ydsp:240
x_st:10
y_st:10
format:ARGB888

That is xact and yact (the virtual resolution seen by Linux) must be the same as xdsp and ydsp (the real resolution been sent to the screen), or else you have a scaled output (x_scale and y_scale not 1.0).

Solution:


If this is the case and you find that xdsp=1280 and ydsp=720, whereas you expected a 1080p display, the solution is in this commit:
https://github.com/Galland/3188-SRC-AP6210/commit/130c1ad6bb47f3b2401b6156f205dcb5882255c7


BTW, notice the 16 bits color: RGB565
I couldn't tell the difference with normal desktop usage, but it means half the memory operations (32 bits ARGB888 <-> 16 bits RGB565).

DWC USB interrupt spam in Rockchip SoCs

$
0
0
Some time ago, when looking for answers to some USB 1.1 problems on the RK chips, like:
- USB 1.1 to Ethernet dongle not working
- Repeated or missing key presses
I stumbled upon some Raspberry Pi forums complaining about the same things.

This is logical since both the Rasp. Pi SoC and the RK3066/3188 are using the same USB HW IP cores (from DesignWare, that is DWC).

One of the problems they were reporting was an excessive number of interrupts per second coming from the USB while the system was idle (I've confirmed it, even with just a USB 1.1 keyboard attached).

One way to check this is with the console command:
vmstat 1
Looking below label "in" will tell you how many interrupts are there per second. In my case, Linux3188 kernel ( http://github.com/Galland/Linux3188 ) on a RK3188 Cozyswan S400 (kindly donated by KSK Electrics) the result is some 10600 interrupts per second.

And a way to see who is interrupting is simply to type:
cat /proc/interrupts
In my case, the "dwc_otg_hcd:usb1, dwc_otg_pcd" is the root cause for some more than 8000 interrupts per second, just as it happens to RPi guys.

The problem seems to stem from the DWC driver, as explained here:
"the Synopsys driver relies on the start of frame interrupt for scheduling transfers if "descriptor DMA" is not implemented (which it isn't, on BCM2835).  8000 is one interrupt per microframe."
and propose the use of a FIQ (ARM fast interrupt handler) for USB IRQs to discard USB microframes that contain no data. More info here...

And the FIQ enabled code lies in this repo (see commits starting in April 2013 by Gordon Hollingworth): https://github.com/ghollingworth/linux/commits/rpi-3.6.y


Radxa Rock board Linux development starts!

$
0
0
So, finally the Radxa Rock board (early developer sample) arrived.

First of all a big thanks to Tom Cubie and his team at Radxa for kindly donating it to further Linux development!


Overview


This tiny board looks fantastic, first and foremost because it has EXPANSION HEADERS, apart from this varied assortment of ports and peripherals:

- CPU RK3188 quad-core @ 1.6 GHz
- 2 GB DDR3 RAM
- 8 GB Flash
- Wifi + BT
- 10/100 Eth
- Audio I/O + integrated microphone + SPDIF Out
- IR RX
- 2 full size USB ports
- 1 OTG USB port
- Power connector (doesn't take up a USB port)

Very nice specs but, to me, what makes this board unique is the expansion headers (along with openly available schematics!) where you can directly plug and access devices through I2C, SPI, UART, ... there is even an LCD output as well as another USB port at those pins!


First boot


After screwing in the protective top/bottom methacrylate plastics you will need a power adapter and an HDMI cable (normal size connector, not mini/micro) to attach it to a display and be ready to boot.

When you power the board for the first time it boots into Android, scaled 720p and in English, version 4.2.2 with kernel 3.0.36+ based on RK3188 R-BOX Android 4.2.2 SDK v1.0.0-130514.
However, beware, there is no Google Play, so you're on your own to install apps.


Hack it!


If you want to tinker with it, nothing easier, turn it off, unplug power and then: while keeping pressed the Recovery push-button nearby the USB ports, plug the OTG USB port to your PC.

A board red LED will light immediately, give it 2 seconds (or it'll boot Android) and, then, you can release the pushbutton and go to your PC.

I'm supposing you're on Linux, so if you go to a Terminal and write "lsusb" you'll see a new nameless device with ID: 2207:310b which corresponds to a RK3188 SoC awaiting flashing instructions.


IMPORTANT TIMEOUT: This recovery mode for flashing powers off after 2 minutes from last flash operation  or from being plugged in (if you do no operations). So it will issue a "power off" command through the serial console and just disappear from "lsusb" output. You'll have to re-plug it again to access it.

Then, through the usual Windows RK-provided tool or with the Linux rkflashtool that you can download and compile with ease from: https://github.com/Galland/rkflashtool_rk3066   (I know, worst name ever, it does handle RK29* and RK31* too).

So download and compile the Linux USB flashing tool:

git clone https://github.com/Galland/rkflashtool_rk3066 rkflashtool
cd rkflashtool
sudo apt-get install libusb-1.0-0-dev
gcc -o rkflashtool rkflashtool.c -lusb-1.0 -O2 -W -Wall -s


Ask the Radxa board about its partition sizes and offsets:

sudo ./rkflashtool r 0x0 0x1 | head -n 11

the result should be:

FIRMWARE_VER:4.1.1
MACHINE_MODEL:rk31sdk
MACHINE_ID:007
MANUFACTURER:RK31SDK
MAGIC: 0x5041524B
ATAG: 0x60000800
MACHINE: 3066
CHECK_MASK: 0x80
KERNEL_IMG: 0x60408000
#RECOVER_KEY: 1,1,0,20,0
CMDLINE:console=ttyFIQ0 androidboot.console=ttyFIQ0 init=/init initrd=0x62000000,0x00800000 mtdparts=rk29xxnand:0x00002000@0x00002000(misc),0x00005000@0x00004000(kernel),0x00007000@0x00009000(boot),0x00010000@0x00010000(recovery),0x00020000@0x00020000(backup),0x00040000@0x00040000(cache),0x00200000@0x00080000(userdata),0x00002000@0x00280000(kpanic),0x00100000@0x00282000(system),-@0x00382000(user)

What does this tell us?

Well, for us Linux developers, used to sharing sticks' space with Android (unless you decide to wipe it and make your Linux take over the flash...) we are bound to flashing our kernels into the "recovery" partition so that we can dual boot Android or Linux by having the latter's filesystem in a MicroSD (also called uSD) card.

And then, from above parameters, where each partition is described as:
        partition_size@partition_offset(partition_name)
we infer that our "recovery" partition is at 0x10000 and has a size of 0x10000
Please remember that the flashing tool requires these numbers in reversed position (first the offset, then the size), like   sudo ./rkflashtool r (offset) (size)


Hence, once you have downloaded/compiled your Linux kernel and have a Ubuntu rfs (root file system) in your uSD, you can go ahead and flash your Linux kernel with these simple commands:

sudo ./rkflashtool w 0x10000 0x10000  <   my_kernel_recovery.img
sudo ./rkflashtool b

The "b" command safely reboots the RK device when the flash is written.

I'll initially be using my most up to date kernel for booting Linux, so you may see some activity there:
https://github.com/Galland/Linux3188

Have fun hacking!

Booting to Linux instead of Android (flashing kernel partition) for RK

$
0
0

1) Get the software

You'll first need to fetch the Linux RK flashing tool (ignore the git name, the tool is valid for RK2*, RK30, RK31 devices), and the Linux rkcrc tool (for pre-/post-fixing a kernel image with the right RK values):

git clone https://github.com/Galland/rkflashtool_rk3066 rkflashtool
cd rkflashtool
make
cd..

git clone https://github.com/Galland/rk-tools.git
cd rk-tools
make rkcrc
cd ..

2) Prepare your own kernel


After compiling your kernel, you have to convert/sign the zImage output file with this command:

./rk-tools/rkcrc -k Linux3188/arch/arm/boot/zImage kernel.img

Substitute "Linux3188" with the folder name where your kernel sources are.


3) Getting device into Recovery mode


This is most usually done by keeping pressed a pushbutton while plugging the USB OTG connector to your PC and then releasing it after a >2 seconds. If upon typing Linux command "lsusb" on the PC we see a nameless device (with ID 2207:...), that's our RK device in recovery mode.

Warning: some devices (like the Radxa Rock) have a 2 minutes timeout for the recovery mode after which it will power off, the timeout restarts upon any flash reading/writing.


4) Know your partitions


Before any flashing operation, we must be sure of at what offset and what size does the partition of interest have. To do it, while in recovery mode, issue the following command in your PC:

sudo ./rkflashtool r 0x0 0x1 | head -n 11

That will result in several lines of parameter information from your stick. We are interested in the last text paragraph, from "mtdparts" to the end.

For example, in my MK908 (check yours, since there are several versions), it is:
mtdparts=rk29xxnand:0x00002000@0x00002000(misc),0x00006000@0x00004000(kernel),0x00008000@0x0000A000(boot),0x00010000@0x00012000(recovery),0x00020000@0x00022000(backup),0x00040000@0x00042000(cache),0x00400000@0x00082000(userdata),0x00002000@0x00482000(kpanic),0x00100000@0x00484000(system),-@0x00584000(user)
These are the partitions' parameters, where each partition is described as:
partition_size@partition_offset(partition_name)
So the "kernel" partition in my MK908 is at offset 0x4000 and has a size of 0x6000  (= 24,576 sectors of 512 bytes each = 12,582,912 bytes).

Warning: If your partition of interest has an offset that is not multiple of 4MB, you MUST follow the "misaligned" instructions below, using your device's offsets.


Always remember that the flashing tool requires the numbers in reversed position compared to what appears in the mtdparts above, that is: first the offset, then the size, like:
sudo ./rkflashtool r (offset) (size)


5) Backup stock partitions!


I strongly recommend to read and store in your PC at least the boot, kernel, and recovery stock partitions of your devices, before you start tinkering with it!

This is very easily done with these commands (substitute the offsets and sizes with the ones from your mtdparts):


sudo ./rkflashtool r 0x4000 0x6000 > stock_kernel.img
sudo ./rkflashtool r 0xA000 0x8000 > stock_boot.img

sudo ./rkflashtool r 0x12000 0x10000 > stock_recovery.img


6) Flash your new kernel


Since my kernel partition's offset (0x4000 = 16384 => *512B = 8 MB) is a multiple of 4MB, flashing it becomes as easy as:
sudo ./rkflashtool w 0x4000 0x6000 < kernel.img


NOTE: If for some unknown reason you wanted to flash a kernel into boot partition, you should flash the same one that is used to flash recovery.

In order to ensure flashing is done correctly, always reboot the stick after flashing with the following command:
sudo ./rkflashtool b

Now your device will always boot to your kernel!

If it is a Linux kernel, then RK will directly boot to it, ignoring Android (until you revert these changes, by flashing back the stock kernel image)


Misaligned partitions (offset not at 4 MB boundary)


If the partition you want to write/flash starts at an offset not multiple of 4 MB then you will find that the first <4 MB that you write are wrong when/if you read them back.

An example of this can be found in Radxa Rock's boot partition, which starts at offset 0x9000 and has a size of 0x7000. If naively flashing boot with the command:

sudo ./rkflashtool w 0x9000 0x7000 < boot.img
That is: flash boot.img from 0x9000 up to, but not including, 0x10000 (= 0x9000 + 0x7000). If we proceed to read back the just written data, in order to verify it:
sudo ./rkflashtool r 0x9000 0x7000 > boot_readback.img

The result will be:
- Wrong, apparently random, data from 0x9000 up to, but not including, 0xA000 (note this is the first 4 MB boundary within boot partition)
- Good data from 0xA000 up to, but not including, 0x10000, that is: just what we've written, as expected.

This will cause the RK device to ignore the bad boot partition and jump on to recovery partition.

As far as I know, this problem arises when writing images, not when reading. It happens for Linux rkflashtool as well as for Windows RKAndroidTool.exe.


Workaround to flash misaligned partitions


The workaround I've found is to flash the previous partition (kernel) at the same time than boot partition. Why? Because kernel partition's offset is aligned to a 4 MB boundary, so there is no problem flashing it. Hence the operation would be:

//read stock kernel (padded to the full size of the partition)
sudo ./rkflashtool r 0x4000 0x5000 > radxa_stock_kernel.img
//concatenate the kernel partition with your own boot partition
cat radxa_stock_kernel.img my_own_boot_partition.img > kernelboot.img
//flash both partitions at the same time (0x5000+0x7000=0xC000)
sudo ./rkflashtool w 0x4000 0xC000 < kernelboot.img

//optionally read back to verify flashing operation
sudo ./rkflashtool r 0x4000 0xC000 > kernelboot_readback.img
//compare what we wanted to write, to what has been written
cmp -b kernelboot.img kernelboot_readback.img

//always safely reboot the RK device after flashing
sudo ./rkflashtool b


Booting Linux on Radxa Rock

$
0
0

For anybody interested, here is a preliminary working kernel for the Radxa Rock board.

UPDATE (2013/10/11): IR and Audio I/O working, updated links to new flash images

Xubuntu Linux on Radxa Rock RK3188 board


This is WORK IN PROGRESS, so few things are supported, even though it's already almost as usable as any stick. This is the current state of affairs (check commits for updated info):

What works?
- Integrated Ethernet 10/100
- USB 2
- HDMI
- Flash
- MicroSD
- RK1000-S sound (integrated mic, audio out jack)
- IR (point a remote at it and press a button while monitoring cat /proc/interrupts ;)

What doesn't work yet?
- Wifi+BT

Not tested?
- Expansion headers
- SPDIF Audio Out / Exp.header Line In
- RTC


I've based development on this repository. To compile it for yourself, you'll have to clone it and use the arch/arm/configs/rk3188_Radxa_Rock_Linux_galland_defconfig file as your .config (UPDATE: the initramfs file necessary for this defconfig, with rknand support, is initramfs-3.0.36+.cpio from here).


OR, if you have the board and want to go ahead with the flashing (supposing you already have an Ubuntu Linux in a MicroSD card inserted in the Radxa board), you have two options:

A) Boot to Linux only: Flash "kernel" partition with this file, so you boot directly to Linux (warning: it won't boot to Android unless you revert this step). Follow these steps:

//backup the Android "kernel" to be able to revert this
sudo ./rkflashtool r 0x4000 0x5000 > radxa_stock_kernel.img
//flash the downloaded Linux kernel instead
sudo ./rkflashtool w 0x4000 0x5000 < kernel.img
//safely reboot (into Linux)
sudo ./rkflashtool b

Now the Radxa board will boot directly into Linux.
In order to recover Android booting you'd have to reflash the stock kernel you've backed up.


B) Usual way: flash the Linux kernel (decompressing this different file) into the recovery partition to be able to dual boot Android/Linux:

//flash the downloaded and uncompressed recovery.img
sudo ./rkflashtool w 0x10000 0x10000 < recovery.img
//safely reboot (into Android)
sudo ./rkflashtool b

Now to get into Linux you have to boot into Android and have again two options:

- Enable Debug Mode, connect OTG USB port to PC, go to Settings->USB->Connect to PC, and then in the PC issue an "adb shell reboot recovery"

- Or, install an Android Terminal emulator (beware there is no Google Play in the RR!) get into it and, with root, issue a: reboot recovery


Since booting back to recovery partition tends to be cumbersome and since I only care about Linux, I have flashed kernel partition and always just boot to Linux!


PS: Just in case you don't have the latest modules and firmware, get these ones into the root (not "root" folder!) of your MicroSD Linux (I insert the uSD card in the PC, open a file explorer as root and copy them at uSD's root).


Bitbanging Radxa Rock gpios

$
0
0
This post assumes you're using the latest Linux kernel from here on your Radxa Rock RK3188 board.

As you may already know, by looking at the openly available Radxa Rock schematics, this board has many GPIOs accessible through two expansion headers (along with other buses like LCD, SPI, I2C, etc.) as well as three user LEDs.

In this brief post I'll explain how to access any of these GPIOs to read/write its value. I've chosen one of the user LEDs to easily see the results of our actions.


By checking the schematics, it is easy to see there is a Red LED connected to GPIO0_B7 (gpio 175), an active low Green LED at GPIO0_B4 (gpio 172), and another active low Yellow LED at GPIO0_B6 (gpio 174).

How do I know the gpio number from the pin name? Relatively easy, look for your pin name here, and calculate the gpio number by taking into account that GPIO_BASE = 160 and NUM_GROUP = 32.


In this example we will toggle the Green LED on and off by following these commands in a Terminal within Linux in your Radxa (or through ssh to the board):

#become root
su root
#tell Linux we want to have access to gpio pin 172
echo 172 > /sys/class/gpio/export
#set it as an output pin (though we will be able to readback its value)
echo "out"> /sys/class/gpio/gpio172/direction
#set its value to 1 (turn off led)
echo 1 > /sys/class/gpio/gpio172/value
#set its value to 0 (turn on led)
echo 0 > /sys/class/gpio/gpio172/value
#in any case read the pin value
cat /sys/class/gpio/gpio172/value

Now, I'll be figuring out how to communicate with SPI and I2C devices hooked to the RR's expansion headers.


Doubts over Rockchip FB Vsync fix

$
0
0
Almost every owner of a RK3188 stick has noticed video problems, like stuttering or a lost frame every now and then, no matter its being a local file or just a small avi.

Some time ago phjanderson (from Freaktab forum) found a solution to this:
http://www.freaktab.com/showthread.php?5939-Fixing-RK3188-video-playback/page2&p=81489#post81489

It basically eliminated a blocking condition on a function on rk_fb.c, which also happened to apparently solve the stutter problem. This was called phjanderson's Vsync fix and lots of ROMs have added this patch since.

I then set out to test it on Linux along with my framebuffer fix (see https://github.com/Galland/3188-SRC-AP6210/commit/a3ddf7e46c4426e6cc67e09d7eee2a14baeea1f0 ) just to find that after a random amount of minutes after boot, there appeared a new thread called "fb-vsync" that utilized 100% of one of the 4 cores on the RK3188, regardless of the system being idle or never even opening a video.

To me, this is unacceptable since it forces the CPU to run at higher frequencies all the time, as well as consume lots more of power and a 25% performance penalty hit.

I initially thought it had something to do with Linux' screen usage or even with my framebuffer fix. However it did happen without the framebuffer fix, so I just let it out of my kernels.

However, I recently read on a forum ( http://www.rikomagic.co.uk/forum/viewtopic.php?p=15682&sid=e872d9b5e003da9082af7976a28fa50c#p15682 ) that Android people are seeing also the 25% CPU usage constant (1 core out of 4) due to this thread.

So I heavily suspect this patch is great for fixing the Vsync video stutter problems, but at the cost of losing 25% of the CPU performance, consuming more power all the time (+heat!), and thus reducing the component's life.

If you happen to have flashed a rooted ROM with Vsync fix and have an Android monitor installed (able to track system threads), please write a comment sharing if you've been able to see the thread in action.


UPDATE:

I'll try to explain a bit the code related to this problem.
Most of it is located in rk_fb.c where:
1) upon registering fb0 (the main framebuffer) a thread called "fb-vsync" is created.
2) This thread executes the function "rk_fb_wait_for_vsync_thread"
3) This function is an "infinite" loop that emits a "vsync" notification to user-space apps subscribed to it, whenever a Vsync happens, meanwhile it waits idle.

How does it wait for a Vsync?
Through the use of "wait_event_interruptible" with arguments:
   - waitqueue: this is the event queue we're hanging on: dev_drv->vsync_info.wait
   - condition:
!ktime_equal(timestamp, dev_drv->vsync_info.timestamp) && dev_drv->vsync_info.active

The 2nd part of the condition (dev_drv->vsync_info.active) should always be met since it is set to 1 just after creating this thread.
What about the 1st part? It compares:
a) variable "timestamp": which is constant!! and set to the value of "dev_drv->vsync_info.timestamp" as it was just before calling "wait_event_interruptible".
b) dev_drv->vsync_info.timestamp as it IS any time the waitqueue is awaken

Naturally this condition is meant to become true (and exit the wait event to send the "vsync" notification) at the next Vsync.

Why? Because "dev_drv->vsync_info.timestamp" is updated by the lcdc interrupt service routine, which at the same time wakes up our "wait_event_interruptible" above!

Then the !ktime_equal compares the "timestamp" variable that holds the PREVIOUSLY set vsync_info.timestamp (before the wait_event is triggered) with the CURRENT, just updated, vsync_info.timestamp.
Hence the condition may indeed become true.


What did phjanderson's fix do? It just made this wait event to always have a true condition, hence the "while" loop is constantly executing (no wait) and notifying a "vsync".

How does it interact with Galland's framebuffer fix? Note that in the lcdc isr, the fb fix excludes the wake_up_... call, so what it does is make the wait event above to never be woken up. Kind of the opposite to phjanderson's.

The union of both fixes is... unfortunate too :) so I just left out phjanderson's fix, since the isr changes are needed for the overall fb fix.


Radxa Rock communicating with I2C devices

$
0
0
Since I'm a hardware tinkerer at heart, and my background is more on electronics than on software, the Radxa Rock board had a deeper interest for me.

This board has a lot of potential for all kind of low level electronics, thanks to its two expansion headers:

Expansion Headers from Radxa Rock schematics


As you can see there are two UARTs (number 3 is shared with some GPS pins), one I2C bus, two SPI buses (SPI1 on J8 is shared with GPS pins), a full 24 bits LCD display output (!!), one USB port (HOST_D*2), one audio Line In (LINE_L/R), as well as several other GPIO I/Os.


I then set out to test my latest kernel for booting Linux on the Radxa Rock to access one of the, for me, most interesting low level hardware buses: I2C.

This one is heavily used for low bandwidth (control/status, sensor data readings, EEPROMs, etc...) communications inter integrated circuits (I I C... I2C ;). This bus consists of just two lines: SCL (master clock) and SDA (bi-directional data), which makes it extremely handy.

And for this test, a handy old friend of mine: the BMP085 pressure sensor (featured on this blog's first post) inside a little PCB with an accelerometer chip, gyroscope chip, magnetometer compass chip, and our pressure and temperature sensor chip, the BMP085.

This is all called a 10-DOF or Ten Degrees of Freedom sensor board, since it allows for precise movement/position detection through "sensor fusion" (though I really dislike using nerdy "magic words").

So first's first, I wired the 10-DOF board to the Radxa's left expansion header (J8) in the following manner:
- PCB's VCC (5V) wired to J8 exp. header's pin 40 (DC5V)
- PCB's GND wired to J8 exp. header's pin 39 (GND)
- PCB's SDA wired to pin 32 (I2C0_SDA)
- PCB's SCL wired to pin 31 (I2C0_SCL)


The result looks like this:

Radxa Rock board bus I2C #0 connected to a 10 degrees-of-freedom sensor board


So, what to do to start communicating with the board? Well, since my kernel already has all the needed things built-in, you just have to follow these steps (shamelessly taken from this guide):

#install i2c-tools (user space) for talking to I2C buses/devices
sudo apt-get install i2c-tools
#insmod the I2C-dev module to allow user space access to I2C
sudo modprobe i2c-dev
#probe I2C bus 0, the one at expansion header J8
sudo i2cdetect -y 0

The result of this last command is the possibly detected I2C devices on bus 0 (remember the 10-DOF board has 4 devices sharing the same bus). In our case we do know the I2C address of the BMP085 (0x77), so we can talk to it directly.

Since I know the calibration parameters of my device (see AC* at first screenshot in this post) and their addresses, I can just compare to see if this is random data, or actually the BMP085 chip, being talked to from Linux running on the RK3188 of the Radxa Rock board:

Calibration parameter AC1, which for my 10-DOF board has a 2 byte value of 6746 (0x1A5A) is located at I2C registers 0xAA (MSB) and 0xAB (LSB), by reading the sensor's datasheet.

Let's dump the contents of the device at that address (the BMP085) to confirm we are talking to it:

#dump non-interactively (-y) contents of selected device (0x77)
#on given I2C bus (0) in byte read mode (b)
sudo i2cdump -y 0 0x77 b

Not really illustrating, but the result is:
     0  1  2  3  4  5  6  7  8  9  a  b  c  d  e  f    0123456789abcdef
00: 00 00 00 00 00 00 00 00 00 00 00 00 00 00 00 00    ................
10: 00 00 00 00 00 00 00 00 00 00 00 00 00 00 00 00    ................
20: 00 00 00 00 00 00 00 00 00 00 00 00 00 00 00 00    ................
30: 00 00 00 00 00 00 00 00 00 00 00 00 00 00 00 00    ................
40: 00 00 00 00 00 00 00 00 00 00 00 00 00 00 00 00    ................
50: 00 00 00 00 00 00 00 00 00 00 00 00 00 00 00 00    ................
60: 00 00 00 00 00 00 00 00 00 00 00 00 00 00 00 00    ................
70: 00 00 00 00 00 00 00 00 00 00 00 00 00 00 00 00    ................
80: a5 94 52 49 a4 27 77 a6 1e 26 1a 5a fb dd c7 bc    ??RI?'w??&?Z????
90: 7c 9e 60 2c 59 11 15 7a 00 37 80 00 d4 bd 09 80    |?`,Y??z.7?.????
a0: a5 94 52 49 a4 27 77 a6 1e 26 1a 5a fb dd c7 bc    ??RI?'w??&?Z????
b0: 7c 9e 60 2c 59 11 15 7a 00 37 80 00 d4 bd 09 80    |?`,Y??z.7?.????
c0: 00 00 bc 33 00 00 00 00 00 00 00 10 00 00 00 03    ..?3.......?...?
d0: 55 01 06 00 00 00 00 00 00 00 00 00 00 00 00 00    U??.............
e0: 00 00 00 00 00 00 00 00 00 00 00 00 00 00 00 00    ................
f0: 00 00 00 00 00 00 80 00 00 00 00 00 00 00 00 00    ......?.........


And sure enough! you can find the values (1a and 5a) of this little example at the expected register addresses (0xAA and 0xAB).

RK3188 is communicating with the 10-DOF board through one I2C bus at the expansion header!

Radxa Rock meets the world of electronics!


DIY NAS with a RK3188 device (Radxa Rock)

$
0
0
I currently have a full-blown Linux PC noisy tower serving 3 SATA hard disks full of multimedia as a home server... that is some 80 Watts of power consumption, plus the noise, for just a few hours of use per week.

There must be a better solution for my home network file-sharing (also called NAS) needs!

So, come the Radxa Rock board, equipped with a Quad Core ARM CPU, the Rockchip RK3188, and 2 GB RAM, quite a beast actually (I'm currently blogging from it, and use it for almost all my PC needs).

And here is today's proof-of-concept RK3188 NAS happily serving files from my desk:

1st rev.: RK3188 functioning as NAS home fileserver (using Radxa Rock board)
UPDATE:
2nd rev.: Radxa Rock as a 3 hard disks NAS (11W idle, 33W with 2 disks streaming)

Now, if you want to bear with me on the technical side... I've been doing the math about data bandwidths for some time already and taken into account the Rockchip datasheet briefs to guess the best I/Os for the task:


Hard disk interface:


Let's face it, Rockchip SoCs don't have SATA ports, and other ARM SoC have at most one SATA port, afaik, and that still means an external power for the SATA device is necessary. That is not a solution for NAS, unless you can fit everything in just one hard disk.

So let's get over it and find the second best solution: USB 2.0 ports are the highest bandwidth inputs (to connect the hard disks). The Radxa Rock board has:

- Two full sized USB 2.0 ports, and a third one in the pins of the expansion connector. All these ports are sharing, through an integrated hub, one single USB bus coming from the RK3188.
- One Micro USB 2.0 OTG  port that is directly wired to the RK3188.

Ideally USB 2.0 would mean up to 480 Mbps raw throughput so, to get the best, we don't want to share it with other devices. Hence, we will be plugging our hard disk/s to the USB OTG port.

Thankfully the market is full of external hard disk enclosures that do a very good job at converting SATA to USB. And let's see what that means:

- SATA is currently doing 3 Gbps
- USB 2.0 is "just" 480 Mbps, here is a bottleneck, certainly, but is it?


Why USB 2.0 is fine instead of SATA

Does this sound like a let down? Really? Let's do the math:

Are you going to be streaming 1080p content over Wifi? That really leaves you with <300 Mbps, and most probably <150 Mbps, if you can maintain that incredible wireless speed.

But, let's see what 150 Mbps really means in today's high compression world:

150 Mbps / 8 bits per byte = ~19 MB/s and let's say your content is a 1h30m long movie...
19 MB/second * 90 minutes * 60 seconds/minute = 100 GB movie!

Is your movie larger than that? Then this solution is clearly not for you. For the rest of the world, let's go on:

You may rightly object: movies have well and bad compressed parts, fast action may mean a bandwidth spike!

Well, you are right, and that's why multimedia players use a technique called buffering! This mostly rids us of the problem.

So once we accept that it's OK to stream things at Megabit speeds, we may stop worrying about using SATA hard disks over USB.


Network interface:


As I/O, the Radxa Rock board has an integrated Fast Ethernet, that is connected directly to the RK3188 (through the usual RMII PHY interface). This means 100 Mbps so... people with movies of >66 GB may stop reading now.  ;-)

For the sake of this proof-of-concept, we will be using this 100 Mbps Ethernet port, although a better solution would be to have a Gigabit Ethernet adapter attached to a full sized USB 2.0 port, which would give us up to 480 Mbps of actual bandwidth.

Do not share the USB OTG port with the hard disk/s! The RK3188 (and the RK3066) has two physical USB 2.0 buses: the OTG and the "full sized", so use both as much as possible, instead of cramming all devices onto just one's bandwidth.


File-sharing Speed Testing:


I am using a bare Xubuntu Linux on the Radxa board so it is possible to connect to the SATA hard disk through FTPS out of the box.

The SATA II hard disk is in a external USB 2.0 enclosure and has a 1.5 TB NTFS partition and we will be using a FTPS server (slower than FTP). Not the best case for speed, but will let us see how well it can do on this not ideal setup.

So, first of all, let's test how fast the RK3188 itself can read files from it, by running this command on the connected [but unmounted] drive:
sudo hdparm -t /dev/sda
/dev/sda:
 Timing buffered disk reads:  90 MB in  3.03 seconds =  29.74 MB/sec
The repeated tests result always around and very close to 30 MB/second. That is some 240 Mbps, or 50% the theoretical maximum USB 2.0 speed.
Who is to blame? I fear in this case it's my old USB2SATA's fault, since doing the same speed test on an i7 top of the line PC yields some 33 MB/s.

Good, more of a worst case then, so let's do real life tests with actual multimedia files on the SATA disk served over Fast Ethernet by the Radxa Rock RK3188 board:

Streaming an 11 GB action movie (1080p) requires an average of 2 MB/s and is perfectly watchable on the remote PC, as if it were a local file.

Transferring a large file over Ethernet to another PC maintains a speed of 6.7 MB/s, that is a bit over 50 Mbps.

I've also tested transferring a file from the MicroSD card where Xubuntu runs, just to do a test without USB and SATA, the result is a constant speed of 7.2 MB/s.

For the sake of completeness, I too have tried this same raw transfer (FTPS from MicroSD) using a Gigabit Ethernet to USB 2.0 adapter, the result is a constant speed of 8 MB/s.
Better and more than enough for our purposes, but still below my expectations. Next thing will be to test with an FTP server, without the FTPS encryption burden!

Further details about these tests: the "intermediary" is a Gigabit switch that has been thoroughly tested at 1 Gbps speeds.

So it seems the RK3188 is perfectly able to cope with the task, even using a heavy encrypted FTPSserver.


Conclusions for a faster NAS file-sharing solution


1) Use a Gigabit Ethernet to USB 2.0 adapter (and from a reliable source or you'll find yourself with a ridiculous USB 1.1 device able of <11 Mbps) and connect it to the full size USB port on your Rockchip board/stick.

2) Set up a simple FTP server for file-sharing, that makes sure your RK3188 can concentrate on reading the hard-disks through USB and the network protocols, instead of the heavyweight encryption for the FTPS. Even if you go wireless, Wifi already encrypts everything on the air!

3) Use Linux-friendly EXT4 partitions. NTFS is not bad, but will require more CPU to read/write (you'll see a process called "mount.ntfs" often). FAT what?

4) If you want to have a 4-disk NAS or even an 8-disks NAS, no problem! Just know you should still plug them all, through a USB hub, to the same USB port.

5) And the final tip to make a nice NAS solution:
sudo hdparm -B 50 /dev/sda
This wonderful command at NAS startup will take care of turning-off your hard disks when they are unused, saving power and hard-disk life, while keeping a 100% silent environment!


UPDATE: If the drive answers with:
HDIO_DRIVE_CMD failed: Input/output error
 APM_level= not supported
Then try this similar command:
sudo hdparm -S 20 -K 1 /dev/sda

(substitute /dev/sda in these commands with your actual /dev/sdX device)


Next step: a quad hard-disk NAS solution based on Rockchip ARMs for all my file serving needs!


Linux on UG008 TV Box (RK3066)

$
0
0
I was looking for the cheapest Rockchip device with external Wifi antenna and/or Ethernet connection, just to find both capabilities in the UG008 TV Box, a RK3066 (dual core) device at just 55 USD (shipping included).

After purchasing it and a quick delivery of 2 weeks to Europe, I set out to test it, since I worried it may be lagging behind the newer 4 core experience with the RK3188 CPUs.

The TV box surprised me being very small, at 7.5cm x 7.5cm and looking really slick and solid. I was glad to see Android feels zippy.


Small and cheap UG008 TV Box (wifi antenna is also just 7 cm)


So, hacking started:

1) Backup internal flash: The recovery button is at a tiny hole in one side, near the front. The only quirk here is that you insert a clip there and stay pressing the recovery button, plug the MicroUSB from the PC to the TV box and then: you also have to press a couple of seconds the power button, before you can release the recovery.

A red light appears around the MicroUSB slot, and on your [Linux] PC you can type "lsusb" and find a nameless device (for my PC's buses/devices, it is: "Bus 002 Device 004: ID 2207:300a  "), the 2207:300a ID is what matters, that is our UG008.

First's first, the "partition table", extracted with:
sudo ./rkflashtool r 0 1 | head -n 11
looks like:
CMDLINE: console=ttyFIQ0 androidboot.console=ttyFIQ0 init=/init initrd=0x62000000,0x00800000 mtdparts=rk29xxnand:0x00002000@0x00002000(misc),0x00006000@0x00004000(kernel),0x00006000@0x0000A000(boot),0x00008000@0x00010000(recovery),0x00120000@0x00018000(backup),0x00040000@0x00138000(cache),0x00300000@0x00178000(userdata),0x00002000@0x00478000(kpanic),0x00120000@0x0047A000(system),-@0x0059A000(user)
We go one by one backing them up into our PC (you can safely leave out some, like user, cache, kpanic), just remember for the rkflashtool command you have to swap the hex numbers above.

For example to backup recovery (to flash our Linux kernel on it), which is listed above as "0x00008000@0x00010000(recovery)", you'd do:

sudo ./rkflashtool r 0x10000 0x8000 > UG008_recovery.img

2) Rooting UG008: Once we are done with that, we should root the device (even if just for the sake of being able to dual boot Android or Linux), the rooting procedure is fairly standard and described here. If you only want Linux on the box, you don't need to root it, keep reading,


3) Flash Linux kernel: You have two options depending on what you want:

a) Dual Boot Android/Linux: This is the usual way, you want to flash the recovery partition. I've found this box to be a close relative of the Measy U2C, for which I published several recovery kernels that are compatible with UG008, you'd be missing Wifi (RK901) and Ethernet. Flashing being just:

sudo ./rkflashtool w 0x10000 0x8000 < recovery.img
sudo ./rkflashtool b 

      If you're into working your way around, it should be easy to add the connectivity. Wifi with RK901 has been supported in Linux sticks for some time already (though I never bothered to check myself, being used to wired LAN), and Ethernet should require only to enable this .config options before building your kernel: CONFIG_NET_ETHERNET and CONFIG_RK29_VMAC.

Generic Linux Kernel building for RK devices is described here. Just remember this is a RK3066 device, so don't compile it for RK3188! The audio codec is the well known RK1000.

Now, in order to boot to Linux from Android you can use this excellent "Autorun Linux" app, or install "Android Terminal Emulator" get inside type "su" and then "reboot recovery" every time.


b) Only Linux (remove Android): Very legitimate. Using the same recovery kernel as above, the flashing procedure is all explained here (but follow the instructions for flashing "boot" partition, instead of "kernel" partition, since you are using a recovery kernel). The boot writing (after you back up that partition!!) can be done with this command:

sudo ./rkflashtool w 0xA000 0x6000 < recovery.img
sudo ./rkflashtool b 

Note: I haven't tested the "Only Linux" approach on my UG008, though it should work, or else you can always flash again your backed up stock partition and be back where you started.


4) Booting Linux: Insert your usual MicroSD card with Linux root file system (rfs) and you're good to go.


Any questions, and polite criticism is welcome in the comments below. I hope this post helps!


Your own official Linux distro in a SD card (for ARM)

$
0
0
Currently for us, owners of ARM devices of the Rockchip family (though this post applies to any ARM CPU), when wanting to boot Linux we have to do two things:

1) Flash a Linux kernel, usually to recovery, in order to be able to boot to Linux
2) Copy a Linux Root File System (RFS) into a MicroSD card for the OS to boot from

This post is about Step 2.


Why can't we use official distributions?


Basically because most distros are [easily] available for x86 CPUs (x86, amd64, ...), not ARM CPUs (armel, armhf). And then, when you find it compiled for ARM, there are some little extras to be done, like copying your kernel's modules into it, and throwing it all into a MicroSD card.

Hence, we are currently forced to choose among static RFS that fellow developers have made available and can update only on their free time, which isn't much. These are:

- Picuntu, from Alok Sinha
- Ubuntu 12.10 RFS, from linuxium
- Home.io, from JustinTime4Tea


These RFS are all just the Ubuntu distribution, sometimes with a different name (Xubuntu in the case of Picuntu, Ubuntu in the case of Home.io), though they usually include extras like:

- The modules (drivers) for many devices (needed for many, but not all, USB gadgets)
- The Flash video ARM support solution I posted here

However let's face it, you are forced to use Ubuntu, and then you depend on the maintainer's free time to grab the latest version of Ubuntu, add the above extras and publish it so you can use it.


Your own Linux distribution's RFS


Here I am going to show how to create your own RFS by grabbing whatever version of Ubuntu (and with few changes any other distro, like Arch Linux, OpenSUSE, CentOS, you name it), and create a RFS to use on a MicroSD card to boot Linux your ARM stick/box. Or to flash the same RFS into your device's Nand Flash chip and avoid the SD card altogether.


Getting an up-to-date official distribution, for ARM

The first thing is getting the Linux distribution (all the programs that make up your booted up Linux: from the "ls" commandline, to the GNOME desktop and the LibreOffice suite) already compiled for ARM devices, instead of the usual x86 for PCs.

This is not difficult since, actually, Linaro is doing just that!
If you want a desktop environment (XFCE, Gnome, KDE, etc.) you have two options:

Option 1) Easy way: (Older version but everything done) Head over to:
http://www.linaro.org/downloads/
Look for "Ubuntu Desktop" in the "Developers and Community Builds" section and click on any of the boards that support it on the right (Origen, Panda, etc. doesn't matter). At the time of writing (Nov 2013) this will redirect you to this page:
http://releases.linaro.org/12.11/ubuntu/precise-images/ubuntu-desktop
So the latest version with the desktop already installed is Ubuntu 12.11, you'll have to install this one in your SD and upgrade to the latest version after booting. Download the biggest .tar.gz file, in my case 473 MB of:
http://releases.linaro.org/12.11/ubuntu/precise-images/ubuntu-desktop/linaro-precise-ubuntu-desktop-20121124-560.tar.gz
Option 2) Manual way (Newer version, but starts with a commandline Linux): You can get the cutting edge latest version of Ubuntu, it will be small and fast but you'll have to type a few more commands, after booting it, in order to install a desktop. Go here:
http://releases.linaro.org/
And click in the folder link of the latest version number ("13.11" for me). A new page appears where you have to select "ubuntu", in the next page select the link that ends in "-images" (prefix depends on Ubuntu's version name, in this case it's "raring-images"), and finally select the version link that you want (nano / developer / server) to get its .tar.gz file.

All three are the same Linux but each one with different sets of packages already installed. They are:

- nano (around 50 MB) gives you a command-line with very very few things (not even a vi/vim/nano editor!), with this version you'll need a network connection (care for /etc/network/interfaces and such) soon enough, to start cranking "apt-get install" for all the little apps.

- developer (around 140 MB) a usable command-line with most things you'll need to comfortably start working and changing whatever configuration. However, IMHO, it includes many packages for software development, while lacking some others more typical of a generic user system.

- server (around 130 MB) a usable command-line with all you need for a quick setup of a desktop environment resembling a PC with Ubuntu. Even if you are a developer you can later install all the packages you need. This is the one I recommend.

N.B.: Compare the *.packages files to get a glimpse for yourself of what's inside each version.

So, following the recommendation we would download this file for the latest Ubuntu 13.11 (Nov 2013, or else go into the page above and get yourself the latest and very best.


Getting the RFS into the MicroSD card (or flash)

First of all introduce the MicroSD card into your PC to partition it in the way that the kernel expects it (please don't use partition utilities, they won't do it!).

Let's say that the MicroSD appears at the folder "/mnt/whatever_folder", then type the following command to know the device name:
df -h | grep whatever_folder
You should see a line somewhat like this:
/dev/sdg1   7,3G   612M  6,4G   9% /mnt/whatever_folder
Now that we know the MicroSD is in "/dev/sdg" (remove the number!!) unmount the MicroSD:
sudo umount /mnt/whatever_folder
And the most important step to avoid later problems: partition & format in this one step:
mkfs.ext4 -F -L linuxroot /dev/sdg
Which labels it "linuxroot" and at "/dev/mmcblk0", where the kernel expects it (CMDLINE), instead of where a partition tool would place it (at "/dev/mmcblk0p1").

SIDE-NOTE ONLY FOR USING INTERNAL FLASH INSTEAD OF A MICROSD:
If you want your RFS to be in your device's Flash chip, and 1) have flashed the right parms, 2) have a kernel with the right CMDLINE for those parms, 3) the kernel has an initramfs.cpio with rknand...ko, then the you have to format it with this command: "mkfs.ext4 /dev/mtdblock0" (mtdblock number is that of your [big] partition).

It may take a couple minutes and when finished you should mount it and start following these steps:

1) Become root (necessary to keep file permissions in the RFS!)
sudo su -
2) Go to the folder where the SD card (or flash) is mounted:
cd /mnt/whatever_folder
3) Extract the downloaded ARM RFS in it:
tar xvfz /home/username/Downloads/linaro-raring-server-20131124-562.tar.gz
4) Since the Linaro .tar.gz contains the RFS inside a folder named "binary", we have to move its contents to the real root of the SD card and then remove the, now empty, "binary" folder:
mv binary/* .
rmdir binary
5) If you are doing this process on a PC, you have to uncompress the modules+firmware file (that came with the kernel you flashed into your stick) into the "/mnt/whatever_folder/lib/" folder.


Or, if you are on an ARM stick, you can just copy your own modules (drivers) and firmware to the new RFS so you have everything from the beginning:
mkdir ./lib/modules
cp -R /lib/modules/* ./lib/modules
cp -R /lib/firmware/* ./lib/firmware
And it won't hurt to copy the library for playing Adobe Flash videos (think YouTube) in ARM (and all the Flash ads and websites, of course):
cp /usr/lib/libpepflashplayer.so ./usr/lib/
If you didn't have it, follow this quick post.


6) You may also want to "touch" certain files to make sure networking works out of the box. For example, if you have an Ethernet connection in your ARM device, then modify the /mnt/whatever_folder/etc/network/interfaces file to add these lines:
auto eth0
iface eth0 inet dhcp
7) It's always a good idea to end operations with this command (to finish all write operations):
sync

You can unmount that MicroSD, because it's ready to boot. If you installed the desktop version the easy way, that's it.
However, if you installed a trimmed commandline version the manual way, you should continue reading the following section.


Getting a desktop environment


Once you boot your device with the created MicroSD card, your first task is to check the network connection. For example type:
apt-get update
If the software repositories start updating, you're good to go. If there is no connectivity: Internet is full of Q&A about networking in Linux :)

Now, with Internet on, in order to install a desktop environment, in my case XFCE (the one used in Xubuntu), I would just type this:
apt-get install xubuntu-desktop
And when asked, say Yes to downloading >400 MB of packages that will use up >1 GB of space when installed, but will land me on the very latest desktop environment for an ARM PC, whatever your CPU (Rockchip, Allwinner, Samsung, ...).


Sorry if it took too long to explain something that is actually simple, but everybody is welcome!
The more users discover that a tiny and cheap stick/TV-box is actually a full-fledged low to mid-end PC (without the noise, size, and the Watts!), the better for all!


OpenSUSE for Rockchip ARM devices

$
0
0


      Going on with the earlier post on creating your own MicroSD with the Linux RFS of your preference, here is the howto for installing OpenSUSE using the usual kernel and modules+firmware.
      Just in case, whatever your stick/box, you can use these very generic 3.0.36+ kernels for RK3066 or RK3188 (only missing internal Wifi).

       In my case I used the excellent Radxa Rock board, equipped with a quad-core RK3188, for the tests and found no problem booting it:

OpenSUSE on Rockchip RK3188 (Radxa Rock board)


     Of course, this has been made possible by OpenSUSE team's commitment to the ARM architecture, since they are one of the few that have put all the necessary efforts to have their distribution compiled for ARM CPUs.

     OpenSUSE's official wiki has one page dedicated to installing on a RK3066 device (MK808 [1]), though it is outdated since, among other things, it uses the old 3.0.8 kernel. However the guide was useful and I wanted to update it here.


Now the procedure, with the same captions as in the original post (for Linaro Ubuntu), for comparison:


Getting an up-to-date official distribution, for ARM
 
     You can check the latest ARM distribution at OpenSUSE by heading to this url:
http://download.opensuse.org/ports/armv7hl/distribution/openSUSE-current/images/

and downloading the "rootfs" suffixed .tbz file, which at the time of writing (Dec 2013) is this one:
http://download.opensuse.org/ports/armv7hl/distribution/openSUSE-current/images/openSUSE-12.3-ARM-XFCE-rootfs.armv7l-1.12.1-Build49.1.tbz


Getting the RFS into the MicroSD card (or flash)

Exactly the very same procedure as in original post, except that steps 4 and 6 are NOT to be done, and step 3 becomes:

3) Extract the downloaded ARM RFS in it:
tar xjfv /home/username/Downloads/openSUSE-12.3-ARM-XFCE-rootfs.armv7l-1.12.1-Build49.1.tbz 


And this last step is necessary (or else the root file system is mounted as read-only, preventing correct boot), open the /mnt/whatever_folder/etc/fstab in your linuxroot and add the following first line:
/dev/root / ext4 defaults,noatime 0 0


Getting a desktop environment

    You already have it. However I've found a problem: upon opening the "Install/Remove Software" you will likely stumble upon this fatal error:

"UI Syntax error. Couldn't load plug-in gtk-pkg. Check the logfile"
Solution is simple [2], open a terminal and type:
su -c "zypper in libyui-gtk-pkg4"
You'll be asked the root's password and the missing package installed, so now you can open the Install Software app.


Enjoy!


References:
[1] http://en.opensuse.org/HCL:MK808
[2] http://forums.opensuse.org/english/get-technical-help-here/applications/487505-opensuse-samsung-arm-chromebook-almost-works.html#post2561668

Hacking into the Minix Neo X7

$
0
0

       Recently, just in time for the holiday season, I have been testing and developing with a Minix Neo X7 and its very handy A2 airmouse.
Minix NEO X7 TV box with RK3188 Quad-Core CPU and 2GB RAM


    This TV box is remarkable to me on the outside for the quality of its finishes, that do make it sturdy and good looking. On the inside there are some probably good choices on the design, namely:

- A quality Audio CODEC (RT5616 that afaik is a Realtek ALC5616) instead of the usual cheap RK1000 shipped on most TV boxes.

- A well suited on-board Ethernet MAC (Realtek RTL8152) as opposed to using the internal MAC of the RK3188, as is done by most other TV boxes, which are riddled with bugs (to list a just few of RK MAC's problems: quirks when connecting Ethernet directly to a PC, stops working on TV-box Linux restart, CPU shut-down upon serving heavy files over SAMBA, ...).

- An on-board battery for the RTC chip (real-time clock HYM8563 to keep the time even without network), which may be interesting for embedded projects with a Linux OS.


    Also, as a less precisely statement, though based on my electronics background, just by looking at the X7 PCB one can find many more capacitors than on most other devices. This is maybe one of the most important good points of this box, since having those capacitors means much more stability, so that it is far less likely for it to hang/reboot while doing heavy duty stuff.

Next time your Android stick/tablet/phone reboots, hangs, or throws you out of an app, think that more than half the times this is due to trimmed down capacitor count, while the rest of the times it's just buggy SW.


Apart from that, Minix has already released twice their kernel sources:

- In September 2013, to well known developer phjanderson (here)

- And then again in December 2013, for the MINIX Developer Challenge, which by the way may be of interest to Android hackers and artists, since they offer well rewarded prizes for the best UI (up until Feb. 9, 2014).


    The practice of respecting the GPL license is something we, as an open source community, value most and certainly distinguishes one vendor from another.

    Think that, even for Android, having kernel sources means an "explosion" of ROMs, developers, and, generally, features such as safer overclocking, updates, fixes (i.e. Vsync screen fix), etc, without the irksome binary patching.

     However, if I could make a wish, that would be the schematics of this TV box, so we can know which CPU pins are connected to which pins of the many ICs on the board, so as to give an even better support for all its components.
     Please note that plain schematics are like the blueprint on hotel room doors, they don't disclose how the hotel was built, just how the rooms are set up.
   

Hacking the machine


1) First things first, you may want to backup your recovery partition (no need to backup the others, unless you have your data on it, since MINIX offers the latest stock ROMs on their site). For that we do the following:
- Coonect the X7 to the power outlet (but don't press the power button yet)
- Connect the X7 to the PC through its USB OTG MicroUSB connector
- Carefully insert a clip into the "Recovery" pin hole (near the HDMI connector) until a pushbutton clicks, and keep it pushed.
- Press the X7's Power button

Then, upon doing a "lsusb" on the PC you'll see the X7 in bootloader mode, listed as a nameless USB device.

You can check the partition table (as a list formatted like: partition_size@partition_offset(partition_name)) by issuing this command:

sudo ./rkflashtool r 0 1 | head -n 11

The partition parameters is what follows after mtdparts. On my X7's revision this looks like:

mtdparts=rk29xxnand:0x00002000@0x00002000(misc),0x00008000@0x00004000(kernel),0x00008000@0x00012000(boot),0x00010000@0x00020000(recovery),0x00020000@0x00030000(backup),0x00040000@0x00050000(cache),0x00800000@0x00090000(userdata),0x00002000@0x00890000(kpanic),0x00130000@0x00892000(system),-@0x009c5000(user)

So backing up recovery partition becomes (swapping size <=> offset):

sudo ./rkflashtool r 0x20000 0x10000 > NEO_X7_recovery.img


2) Second step would be to root Android, so you can reboot to recovery (i.e. Linux) anytime. Rooting the X7 is done as described in this post.


3) Now you want to compile your kernel with the options (.config) you prefer, just remember to use the latest kernel source, at the last line of the MINIX Developer Challenge announcement.

As a base for any hacking, the stock Neo X7 config is: /arch/arm/configs/box_3188_r2_defconfig

To compile your own kernel you can follow this post: Generic Linux Kernel building for RK devices.


4) Last step is flashing your shiny new kernel to the recovery partition of the X7. This is done with the following two commands:


sudo ./rkflashtool w 0x20000 0x10000 < recovery.img
sudo ./rkflashtool b


5) In order to boot to Linux, you just need to insert an SD card with your Linux RFS (you can create your own RFS as described here) and then, you can either use this excellent "Autorun Linux" app, or install "Android Terminal Emulator" get inside it, type "su" and then "reboot recovery" every time.

That's it, happy hacking!


Regarding Android 4.4 KitKat


Yesterday Minix issued a brief message regarding the recently announced, supposed, Android 4.4 support on some RK3188 devices from other vendors [that do not release their kernel sources].

Since I have been myself, along with other well known developers in the RK Linux community, doing work on upgrading the RK kernel to newer versions (3.0.36+ is tremendously outdated), I can confirm Minix' point of view, that the supposed 4.4 support by those other vendors is indeed FAKE.

The leaked 4.4-supporting kernel is the same old 3.0.36+ kernel with just some drivers in different structures/places and the bare minimum to trick Android 4.4 into believing it is running a newer kernel.
Naturally this is a recipe for bad outcomes, instability and developer support dispersion.

It kinda feels like those MicroSD cards that are labelled 8 GB but are internally just 4 GB...

So, I really look forward to the official release of a real Android 4.4 and its kernel sources. Until then I think we are better off with a nice theme in our current and more stable Android Jelly Bean.


Minix Neo X8H HW tinkering first impressions

$
0
0
I just got my hands on a Minix Neo X8-H TV Box, along with an M1 airmouse, courtesy of Minix, with the aim of porting Linux to it (Amlogic Quad-Core processor this time).


First impressions


I won't bother you with the specs, which you can review at Minix' X8-H product page. However, from a subjective point of view I can say Android 4.4 Kitkat feels pretty fast and stable and, despite the youth of this processor, I haven't run into any problems while using it.

However nobody should be surprised here, since Minix was the one that honestly repudiated releasing for its devices the embarrassingly fake "Android Kitkat Betas" that plagged chinese Rockchip sticks at the beginning of this year.


One thing that I found immature though was the H/W video decoding, since using MX Player I was absolutely unable to avoid seeing the subtitles in MKV movies, no matter how many forced/unforced subtitles checkmarks I removed. This does not happen when using a Rockchip TV box, so a newer Amlogic firmware should have to fix this.


The M1 airmouse is small, looks slick, and has an accurate response, I really like it.

However, when I removed the USB receiver from the X8-H, I found myself with the plastic cap in one hand and the electronic PCB still connected to the USB port... so better handle it with care.


The serial console


That said and, after fellow developer Omegamoon dared open it first and find the UART pins, I went about to do the same since, as you may already know, the UART (or serial console) is necessary for first tinkering with ROMs/Linux, due to being the place where all debug output is dumped to, way before you get anything on screen. And, of course, no kernel compilation works the first time, at least not for me :P

Apart from that, and until flash reading/writing through USB from a PC Linux is provided with tools by Amlogic, the best way to flash and reflash this device is to use the "u-boot" bootloader, through the serial console. U-boot is what runs after power-on but just before any kernel, Android or Linux, is loaded. In fact, u-boot is in charge of loading the kernel.

Hitting Enter on the serial console while the X8-H boots is enough to get a u-boot prompt instead of booting to Android.


PCB inside Neo X8-H


Just as its smaller brother, the Neo X7, the internals of this device boasts quality. And you may say: Why?

Well, let me recount a few items that you will NOT find on other cheap TV boxes that usually suffer from reboots in the middle of your favorite movie:

- The processor has a large heatsink of quality metal on it (instead of crappy tapes)
- The memory has that large heatsink also over it. What? The memory also has a heatsink!
- The large heatsink has another heatsink on top of it! What? Yes, attached to the top of the box!


Minix Neo X8-H PCB

Not enough?
- There is an embedded battery to keep the RTC time while powered off
- Count the number of capacitors, coarsely that's a major plus for stability.
- They even soldered pins for the UART serial console!! (bottom left)

Yes, the UART pins are right there for us tinkerers:

UART RX/TX pins plus power pins


So, with just a 3 pin [low-profile] connector broken in two, I was able to get them out:

Black for Ground, Red for X8H's TX, Blue for RX.

With a rather ugly cutout at the back of the box (upssss):


And, finally, connecting it to my PC through a Serial2USB board, the full boot log was available, including access to the u-boot console (boot log here).


Quick tests


The u-boot version is reported as this bizarrerie: U-boot-00001-g473771c-dirty
As far as I know it should be the year followed by the version within that year, so I guess somebody must have changed it, obscuring the source code it's based on.

u-boot log on Minix Neo X8-H

Once booted, Android reports kernel version 3.10.33, which is the latest one openly provided by Amlogic, and which, after some comparisons I believe is based on Linaro Stable Kernel tree for Android, which currently has the same version.

Unfortunately, I have found a few of the same device-specific kernel source modifications by Amlogic people, so typical of Rockchip kernels. That is ugly, prevents mainlining (using the official kernel and easily updating it), and is really badly looked upon.


On the bright side, this kernel is very modern and, magnificently, it is device-tree based.

What's that you say? Well, a device-tree file would allow you to use the very same kernel (no recompiling ever!) among all devices using, at least, the same Amlogic processor.
You just need to flash a different device-tree file! It's like an index telling the kernel what does the box in question have inside and where to find it.

Previously, on the dark ages that Rockchip sent us to, every vendor wildly modified the kernel source with its own, often buggy, little specifics, which caused an explosion of RK kernels everywhere, a chaos where you used a different kernel for each device and went crazy to keep them all up to date.


I have done some quick tests like extracting the device-tree file. Here you can see the device-tree of Minix Neo X8-H, which you can compare to the one posted by CNX-Software for the Tronsmart Vega S89 device-tree, it's interesting!


Another thing I've done is test the capabilities of u-boot, like being a client for a TFTP server on my PC, where I plan to place my kernel compilations, to download and flash to the Neo X8-H, like in this example:

u-boot getting new file for the X8-H from a TFTP server

I have been told that Minix may soon be releasing the source code its TV box is using, which is again one of the nice things we can expect from Minix, who has already released it before.

Once that is done I'll go on to recompiling and trying to get Linux into this beast! Stay tuned for the instructions!


Getting Linux on the Minix Neo Z64

$
0
0
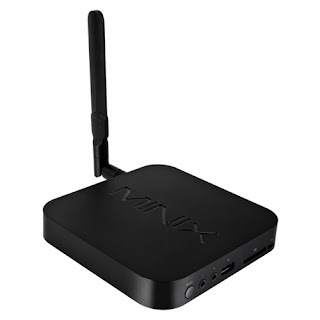
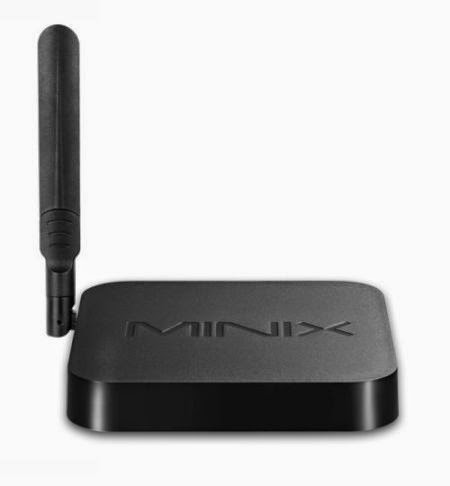
      I have recently received the latest Minix Neo Z64, courtesy of Minix. This TV Box is equipped with an Intel x86 processor, an Atom 3735F, which is not so far off a low-end PC desktop but at just 2.2W making it fanless. You can check its respectable specs at this Intel page, and even compare it against other Intel CPUs.


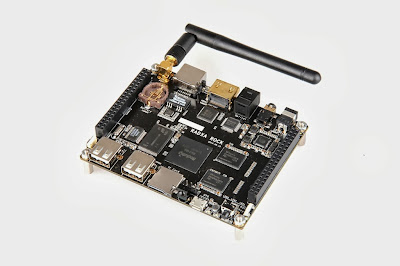
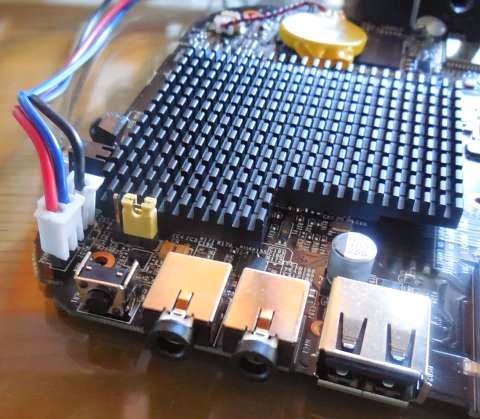
The Z64 is smaller than previous Minix TV boxes, which is nice. As always, a good quality power adapter, HDMI cable, and remote are bundled in the box. The Wifi antenna design is non-detachable, and this time I have been unable to find a way to open the box in order to take the customary PCB photo. Sorry about that :-(

Apart from that, you get 32 GB fast eMMC flash (instead of the usual slower NAND flash chip), 2 GB DDR3 RAM at 1333 MHz, two (ouch) USB 2.0 ports, Ethernet 10/100 (ouch), Wifi and Bluetooth.

I find several big reasons to prefer this TV box over ARM ones:

- the x86 architecture is completely PC SW compatible (think Adobe Flash)

- Intel has a solid background on Open Source, like its Linux GPU drivers (2D/3D) which are top of the line. You even have 3D support on the HDMI interface (see 5.4.1.3 at the CPU datasheet here).

- For HW accelerated video decoding you have a VPU supporting 1080p60 decoding for H-264,  WMV9, and MPEG-2 (see 1.4 on Type 3 SoC at the CPU datasheet here).
 
- And one important thing: the USB controller. Usually ARM CPUs have DesignWare's USB controller, which has nasty and buggy firmware/driver, leading to lots of problems with USB devices (webcams, external hard disks, 10/100 USB Ethernet and Wifi dongles). However, here we have a good and robust Intel USB controller.

The last reason alone has made me jump into switching my NAS home media server (which has several USB hard disks) to this Minix Neo Z64 with Linux.

This tiny Intel CPU even has virtualization features (VT-x), you could even install Xen on this (or even Qubes-OS, if you are serious about secure computing).

So... sorry Windows 8.1, you look nice and you run fast, but Linux and I...


Hence, find here instructions to get into the Minix Neo Z64 whatever distribution of Linux you prefer. I don't like creating distros when you can very easily install a standard one.


Live Linux USB


     First of all get a USB pendrive that can be erased, so we can start Linux on the Z64 to make a backup of Windows, before removing it.

I've developed a liking for Xubuntu (XFCE based) after Canonical decided to outsmart all of us by inventing their hateable GUI, and then Gnome followed suit with its 3.0 version.

You can use any version of Ubuntu, they'll work the very same way as described here. Just head to the corresponding official Ubuntu page and download the x86_64 version (also called amd64) of the distro.

I wish I could tell you that's it, but truth is somebody messed up somewhere and all Intel Atom boxes/MiniPCs I know happen to have a 32 bits UEFI BIOS, which complicates booting a 64 bits OS, so there is one extra step.

This consists of adding a 32 bits bootloader to the 64 bits one in the Ubuntu distro so it can boot, that's it. You can either download the bootia32.efi bootloader from this link or you can follow the instructions (from the same place) to build it yourself.

Now, about creating a LiveUSB for UEFI systems and modifying it... people around are resorting to using a tool called Rufus that requires you to use Windows... ugly.

However, there is a simple way (thanks lopaka) to do everything from your usual Linux PC (the lines preceded with "#" are just my comments, disregard them):


#first erase the USB pendrive
sgdisk --zap-all /dev/sd_
#create a new GPT partition for booting on UEFI systems
sgdisk --new=1:0:0 --typecode=1:ef00 /dev/sd_

#create a FAT32 partition, as expected by the UEFI BIOS
mkfs.vfat -F32 /dev/sd_1

#create a temporary folder

mkdir image
#mount the FAT32 partition (only root can mount)
sudo mount -t vfat /dev/sd_1 image/

#uncompress Ubuntu onto the mounted USB
sudo 7z x xubuntu-14.10-desktop-amd64.iso -oimage/

#add the 32 bits bootloader (see blog above)
sudo cp bootia32.efi image/EFI/BOOT/

#finish any pending writes
sudo sync

#unmount the USB
sudo umount image

#remove the temporary folder
rmdir image

Please note that ALL references to the USB disk above are in the form "sd_" or "sd_1", this is because you can delete your hard disk if you just copy paste this code, so don't!!! You first have to find if your USB pendrive is at sdb, sdc, sdd, sde, or whatever sd*.
Easy way is, without the USB drive inserted, type in a terminal:
ls /dev/sd*
And then again, after inserting the USB. The new sd_ (without trailing number) is your pendrive. Use that letter instead of the "_" above.


BIOS settings


   In order to boot the Live USB, connect a keyboard to the Minix and as soon as you press the power button, start pressing several times the "Del" key to enter BIOS setup (if screen remains black after 10s, then you'll need a PC monitor instead of a TV to see it).

BTW, the sensible way to forcefully power off the box, if there is nothing on screen, is to keep pressed the power button for a bit more than 5 seconds.

On the BIOS screen, go to "Advanced", then "CPU Configuration" and on the "Execute Disable Bit" hit Enter and select Disabled.


By the way, just in case you dig through the BIOS options, you may see one named "ISP PCI Device Selection", just ignore it. I say this because it mentions that it should be another value for Linux, but never mind that, leave it at Windows.

However, there is a very important change to be done, find the "Quiet boot" item. It must be disabled since there seems to be something missing in the GFX initialization that the BIOS is doing but Linux is missing. Maybe the logo that appears (when Quiet boot is enabled) instead of the usual BIOS text is pushing the GPU into an incompatible video mode, and it prevents booting Linux (black screen).

Head to the last menu page (the one on Boot options) and select the option to Save Settings (without reset or exit, just save).
 
Finally, if the above instructions for the USB preparation were followed, you should see the pendrive's name or brand listed in the "Boot Override" choices at the bottom, select it and hit Enter to boot.

On the grub2 menu that should appear select "Try Ubuntu before installing".
If you get a black screen or Windows, then you may be missing the bootia32.efi file, re-do the instructions above on USB preparation.


Backup Windows 8.1


      Since Minix bundles a fully licensed Windows 8.1 with Bing (as opposed to many other TV boxes that come with a 30 days trial version), it is a good idea to back it up to avoid losing the licensed OS, in case we wanted to switch back to it anytime.

This part of the instructions is based on this CNX-Software's page, the news site for hacking with embedded devices; though there are additional things to make Linux work on the Z64.

We will install "pv" as a convenience, to monitor the copy's progress, since the backup takes several minutes to complete.

Just open a terminal and cd into the folder of another USB pendrive (the Live USB is read only so nothing survives reboot) to execute these commands:

sudo apt-get install pv
sudo dd if=/dev/mmcblk0 bs=16M | pv | gzip -9 > Z64_Win81.gz

Most of the 32 GB flash is empty, so gzip'ing it produces a much smaller file (mine was some 4 GB, instead of 32 GB)

To restore Windows 8.1 from the backup you should follow this section up to the "pv" install, and then do:

gzip -dc Z64_Win81.gz | pv | sudo dd of=/dev/mmcblk0 bs=16M


Installing Linux in Flash


Finally! Click on the icon to Install Ubuntu and start the setup as usual.

When asked about the partitioning select the do "Something else" choice and you'll be presented with the current partitioning of the internal eMMC flash that contains Windows 8.1.

We are going to wipe Windows. But you have to leave the first two partitions untouched, they are mmcblk0p1 and mmcblk0p2. Together they amount to less than 240MB and are needed to boot EFI (at least p1, the FAT32 one).

However, you can perfectly remove the "Win" and "Images" partitions, which together are around 30 GB of space.

I used all but 2 GB for an ext4 partition to be mounted at "/" where Linux will reside, and the remaining 2 GB for swap partition (the ancient recommendation is to match your RAM size in swap).

Even if this is a Flash, it's ok to have a swap partition, it should be seldom used, only when you start filling up the RAM, but a home server should be ok even without it.

On the booloader device dropdown at the bottom of the new window, select "/dev/mmcblk0" not other, just that one (or update-grub2 later may update the wrong place and you'll end up with two "ubuntu" entries on the UEFI BIOS).


Once installation is finished (this is based on Linuxium's great work here), you'll need to boot once more with the Live USB, but when presented with its grub2 menu, press 'c' to go to its console and enter these three lines:

linux (hd1,gpt3)/boot/vmlinuz-3.16.0-31-generic root=/dev/mmcblk0p3
initrd (hd1,gpt3)/boot/initrd-3.16.0-31-generic
boot


If you used a different Linux distro, the version numbers may be different. You can use grub's auto-completion, with the Tab key, to help you find your vmlinuz and initrd files for you.

 The Ubuntu that you have installed on the internal eMMC flash will boot up, connect to the Internet with an Ethernet cable (there is no wireless out of the box) and enter these commands on a terminal:

sudo apt-get install grub-efi-ia32 grub-efi-ia32-bin
sudo cp /boot/efi/EFI/ubuntu/grubia32.efi /boot/efi/EFI/ubuntu/grubx64.efi
sudo update-grub2


Now you can power off, remove the pendrive, and boot again

You should then boot to your Linux.


If you see a Windows bluish screen stating that there is something wrong, then you'll have to enter the BIOS once more and change the Boot priority #1 to "ubuntu".


Limitations


Please note Wifi (Realtek RGN RTL8723BS) is not working out of the box, but CNX-Software's page provides info on compiling its drivers from source.

Also the sound (Realtek ALC5642) is not working, there is one person around that says to have fixed it by using Chromium's Intel firmware (see this page) but I've tried it and, even though a new output appeared in the audio mixer, nothing sounded and the "dmesg" log was full of errors related to audio.

If you google around for ALC5642 and Linux there seems to be a good place to look for the driver (see this page) whenever it appears.


That's it. Enjoy!


Stream movies to Android devices

$
0
0


    After battling for some time with how to best stream movie content through Ethernet and Wififrom a media server (the Minix Neo Z64 running Linux in this case) where my USB hard disks are plugged, to Android devices connected to my TVs, I've found that the very best method for smooth streaming is to serve the files with a web server.


      That way, on any Android in the house (phone, tablet, TV box, MiniPC, or even an x86 PC) I can use a Web Browser to connect to the Z64 (with its static IP), then navigate my movie folder and click on the link of the movie I want to watch.
Android will prompt with what movie player (I use MX Player, and BSPlayer when MX has trouble) and playing will start, without installing any other app at all!

       I have even been able to have XBMC (now Kodi) on an Android device to read and manage this web-served movie collection just by adding it as an http server (however very long filenames are cut, making it harder for XBMC to link it to the Internet movie database).

For the basics of a NAS on Linux, you can read this article, which was for my original setup with the RK3188.


To serve the files just install on the Minix Neo Z64 a nice light web server, such as nginx. Then it's just a matter of editing the file /etc/nginx/sites-enabled/default to add a section for your file-web-server, like this:

server {
    charset utf-8;
   
    root /mnt;
    index index.html index.htm;

    server_name 192.168.1.4;

    location / {
        root /mnt/;
        try_files $uri $uri/ /index.html;
        autoindex on;
        autoindex_exact_size off;
        autoindex_localtime off;
    }
}

You'll just have to change the IP for the static one of your Z64, and the two lines that start with "root" which should point to the root folder that you want to share (subfolders will be shared too).

The "charset" line is very important for all of us with accented languages. The "autoindex" lines do the magic of creating a link for each file in a folder.


Then, on any device on your local network enter the Z64's IP on a web browser and you'll see the files and folders under /mnt in your Z64.


I usually install also the openssh-server so I can ssh into the Z64 from my PC, instead of connecting it to a TV.


BONUS: Add a script to init that executes one line like this for every hard disk (substitute the sd_) connected to the media server:
sudo hdparm -S 20 -B 50 -K 1 /dev/sd_
 This invaluable piece of advice makes sure that the hard drivers spin off when not used for some time (half an hour I think). This will enhance by orders of magnitude the life of your precious hard disks, and will reduce your energy bill.

Viewing all 38 articles
Browse latest View live